Saturday, October 29, 2011

"What's A Ghoul To Do But Eat De Chocolat" by Leigh S-B

Happy Halloween Everyone!

Here's another Halloween themed card featuring my favourite little Goth Girl and the new Mansion digi stamp just in case you need some last minute inspiration!  


Today Blockheads Goth Girl is a Ghoul Girl and she's trick or treating for chocolate at the Haunted Mansion!  Chocolate is the theme of this card in more ways than one so pop on over to my blog, Leigh S-B Designs, to find out what my surprise chocolatey ingredient is ;0)
All the colouring is done with the new Marvy Le Plume Permanent markers.


Have a spooktacular Halloween weekend!

Happy Stamping!
Leigh S-B
THE SHARPIE DOMINO QUEEN

Friday, October 28, 2011

Vintage Framed Santa

Hi Blockheads!
I have a Vintagey project to show you today.  I used on of the new Christmas images from "An Illustrated Christmas".  Have you checked out this new set?  It is fabUlous!  Here is the set.


I used the Santa for the "picture" in an altered Frame (size is 6 1/2 inches).  I stamped Santa on canvas paper and turned a plain frame into a festive, vintagey piece of art.  This will be  a great piece for the mantel, coffee table, or  the wall during the Holiday season.  


For materials, instructions and more photos (including the before of the frame) click over to my blog, Dreaming and Creating.    I also tell you how to make that ribbon treatment.  Have a great day, and I hope you can find some time to relax and enjoy stamping this weekend.
Karen McAlpine

Thursday, October 27, 2011

4-Sided Spellbinders Ornaments


I created these ornaments with Spellbinders Labels Sixteen and our coordinating digital images (which come free with the purchace of the Labels Sixteen die set).  I simply printed the PDF on Cryogen Curious Metallics Cardstock and colored 2 of the large frames and two of the framed verses using Marvy Alcohol Markers.  In a step coming up, I will cover these dies with clear glass Micro Marbles and I find the easiest way to do that is to apply double-sided industrial strength red liner tape before die cutting the images so I can cut the tape and paper at the same time. 

Red liner tape tends to gum up punches but it works great with dies, with no sticky mess at all.  The red liner tape and marbles are optional.  You'll see in a second similar ornament where I added marbles only to the edges after the ornament was fully constructed.  Whether you're die cutting just the cardstock alone or with red liner tape, you'll want to secure the die to the image with a removable tape.  I use Post-It tape because it peels off the cardstock easily without tearing it or leaving any residue.  It doesn't adhere strongly to the red plastic liner on the tape so if you get frustrated, try a stronger tape.  Strangely, the dies cut through the tape and the cardstock but don't cut through the liner.  This is part of the reason it's such a clean process.  Simply peel the image and tape away from the liner.  The frame of the cardstock will stay adhered to the liner so you can throw that all away unless you cut the tape and cardstock cleanly enough that you can use it for another project.

Your tape covering the image is exposed at this point so go ahead and apply your Micro Marbles using a tidy tray or box lid before the tape gets stuck to something.  I started with a few of the 1mm marbles, then covered the rest of the tape with .5mm marbles and then filled in all the gaps by adding a final layer of Micro Marble sand.  I poured off the excess marbles with each step back into their containers so I didn't contaminate my sizes.

Do these same steps for any of the layers you plan to cover with marbles.  I did two large panels and two small panels.  The ornament requires 4 large panels so I cut two plain red large shapes and centered the smaller framed verses onto the red panels and drew some doodles using a gold metallic paint pen on the exposed red panel.  You'll want to fold all 4 large panels diagonally in half as shown.  The panels covered with marbles fold easily.  I used 1/8" red liner tape around the back edges of each panel to secure all four into a star shape.  I've used ATG tape for this in the past and found the panels pulled apart over time.  Before securing the final two panels I folded a single strand of 14K Gold Mizuhiki cord in half and then in half again using the double loop end as the hanger for the ornament hook.  I used a small 1/8" piece of red liner tape to wrap the top of the strands so the loop doesn't slip and snipped the single loop at the bottom to make a sort of tassel.  After securing the final panels of the ornament I twisted the bottom of the Mizuhiki tassel strands around a skewer to shape them.

The above left photo was taken in noraml light with no flash and the photo on the right was taken in low light with a flash to demonstrate how the clear marbles can really sparkle in the tree lights at night. 

Below is an example that also uses our digital file but also uses stamped images from our Illustrated Christmas and Figgy Pudding Christmas stamp sets.   I didn't add any redliner tape or marbles to the surfaces of the panels so the ornament has less weight than the ornament above.  I added 1/8" red liner tape folded over the edges of the panels and covered them with 1/2mm Clear Micro Marbles.  The marbles made a big difference in the look and feel of the ornament, and kept it from feeling like a paper disposable ornament.


Tuesday, October 25, 2011

Thanksgiving Digis from Blockheads Stamps

Hi Fellow Blockheads!
I wanted to show you some CAS Thanksgiving Cards using the new Digital images.  I used  Pumpkin, Turkey, and Thanksgiving Words.   The images were colored with Copic Markers.


There are more photos and instructions over on my blog, Dreaming and Creating.  Have a great day!
Karen McAlpine

Thursday, October 20, 2011

Zentangle'Ween Digi Stamp Projects by Leigh S-B

 Happy Thursday Blockheads Fans!

Have you been swept up by the Zentangle phenomenon? I sure have and I love it!
Of course it goes without saying that stampers have taken Zentangles further by doing them inside rubber stamped images and digi stamps. I had a little medical procedure done last week and in my down time I got some Zentangles done!  I hope you like them ;0) 

Today I'm sharing two Zentangle cards and a jumbo Tag I've made using Blockheads Paper Arts new line of Digi Stamps! Pop on over to my blog, Leigh S-B Designs, for all the details!  

I've got some Thanksgiving Zentangle projects in the works too so stay tuned for those ;0)


Happy Stamping!
Leigh S-B
THE SHARPIE DOMINO QUEEN

Sunday, October 16, 2011

CAS Medallion Cards

Dear Blockheads,
Hello and I trust you are having a great weekend.  I have some card samples for you today.  The cards are Clean and Simple and go together in a flash.  I think you will love the results.  One  stamp set was used for all the cards: Nature Medallions.  For a Materials list and detail photos, click over to my blog, Dreaming and Creating. 


The three large Medallions were used from this set.  I used lots of pretty Cardstock colors and inks.  I varied the embossing folders on each card.  


A great set of all occasion cards.   I will add sentiments to the inside and send out to friends and family.  And, I thought that you might enjoy working on these over the weekend.  We are having rain here today and it is good day to get some cards made.  Enjoy your weekend!
Karen McAlpine

Tuesday, October 11, 2011

Pretty In Pink ATCs

Hello Everyone!
We are Pretty In Pink today with two ATCs (2 1/2 x 3 1/2 ).  I used the Dress Form image from the Vintage Travel set.


I used some canvas paper for the base on both of the ATCs.  I brushed on some acrylic paint to the canvas paper and cut to size.


For a Materials List and Instructions, click over to my blog, Dreaming and Creating.  Have a great day!!

Karen McAlpine

Monday, October 10, 2011

"Passion For Purple" Marvy Le Plume Permanent Markers Blending Tutorial by Leigh S-B

Hey Blockheads!
By now you've heard quite a bit about these new alcohol-based permanent markers called Le Plume Permanents by Marvy!  I posted my review on them on Sunday which you can read 
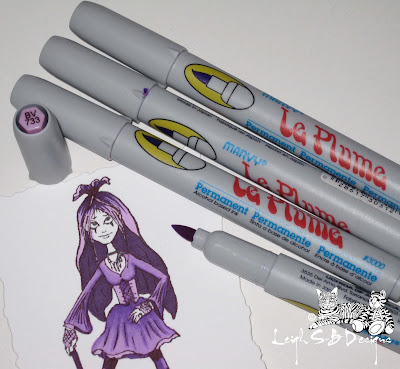
here if you missed it and now I'm back today with my first Blending Tutorial called "Passion for Purple"!


In this tutorial I'm showing you how I went about colouring the Goth Girl image I used on my 
"Miss Purple Poison" card and you can see the full tutorial for my card on my Blog.

I used four Le Plume Permanent markers from the Blue Violet range for this tutorial:
BV733, 736, 738 and 739.
  

Stacey and I worked together and came up with these nifty Blending Sets to help make things easier for you.  The Blending Sets give you a running start by taking the guess work out of which colours blend well together and ensure you start building your collection the right way right from the get go.  The Blue Violet Blending Set is now available from Blockheads Paper Arts and consists of BV733, 736 and 738.  My tutorial includes BV739 but it's not absolutely necessary to have the darkest shade at this time but if you really NEED to add BV739 to your set then please contact Stacey Dunning at Blockheads for more information.

So let's get started!

Stamp the image with Memento Tuxedo Black ink onto white cardstock that is suitable for alcohol-based markers like the Le Plumes and Copics.  Blockheads Paper Arts also now carries Neenah Solar White which is the recommended cardstock for all your Le Plume/Copic needs.

Step 1
Start by colouring in the areas with the lightest shade, BV733.


Step 2
At this point I've decided my light source is coming from above and to the front of the figure.
Lay in the first level of shading with BV736 which is a slightly darker shade
of purple. 


Step 3
Blend the two colours together by going over all the areas again with the lighter marker which is BV733.

Step 4
Lay in the next darker shade of purple, BV738.


Step 5
Blend everything together again with the lightest marker, BV733.


Step 6
Repeat Step 2 - 5 again on the dress and shoes and apply more of BV736 and 738
and blend everything together with BV733.   The folds in the dress have now taken shape and the figure has a sense of depth and dimension now.  I then moved onto her stockings.
Colour the white areas with BV736 and then lay in the shadow areas down the inside of both legs with BV738.  I didn't do any blending of these two colours because the sharper edge gives a better impression that a shadow is being cast.


Step 7
 Now this is where I start working with the darker of the 4 markers, BV739.  You can quite easily use BV738 or even black for these areas.  If you use BV738 instead just lay in the colour and then go over the same areas again a few more times.  This is what's awesome about alcohol-based permanent markers, you can go over the same area again and again and the colour gets darker each time.  So you can definitely get away with only 3 colours for now and get similar results!
Colour in the hair, the platform shoes, the cane and the black sections of the stockings with BV739.

Step 8
 Colour in the rest of the hair and blend over BV739 with the lightest marker, BV733.  At this point I could have added more shading and depth to the hair with BV738 but I went with BV739 which you'll see in the next step.  I also used BV733 on her gloves, corset and petticoat.


Step 9
Draw in some hair detail with BV739 and leave it as is.  There's really no rules, it's just a matter of personal preference really so you just go with the look you prefer!


Step 10
I filled in areas of the tuft at the top of her head with BV736 for more colour variation.


Step 11
I used Prismacolor coloured pencils on her skin and face details.  I then added the background and edged the deckle cut with a Prismacolor coloured pencil too.


Step 12
For even more drama I edged the deckle cut with a Black Prismacolor coloured pencil and finished off my Goth Girl with white highlights.  I used a combination of a white Gelly Roll pen and the new Marvy Le Plume White which is an opaque water-based marker.


She's pretty stunning decked out in purple head to toe isn't she!
And that concludes my first tutorial on how to blend with four Marvy Le Plume Permanent markers.  I hope you enjoyed it and that I've provided some insights into how to go about creating some awesome blends and giving your stamped images dimension with shading and shadows.  My tutorial also shows you how much fun you can have with just 3-4 markers.  Just start your collection by picking your favourite colour or the colour range that you find you use the most in your stamping and then select the Blending Set that will work for you!  The Blending Sets provide an inexpensive way for you test out the markers without breaking your crafty budget and allows you to have beautifully coloured images straight away too!  It's that easy!

If you're a Copic fan or are considering starting your own Copic collection then Blockheads has you covered too coz they're now carrying the Copic Sketch range and you can follow all of these Marvy Le Plume Tutorials with your Copics too!  Stacey has provided a Comparison/Substitute Chart so you can use the equivalent colours in your projects.

Stay tuned coz I have more Marvy Le Plume Permanent Tutorials full of tips and tricks to come!
Happy Stamping!
Leigh S-B
THE SHARPIE DOMINO QUEEN


Sunday, October 9, 2011

Marvy Le Plumes Permanent Markers Review by Leigh S-B

Hello Stampers!

For those of you who don't know me my name is Leigh S-B and I'm a designer for Blockheads Paper Arts :0)  I'm here today to share my thoughts on a brand new permanent marker that is going to be very popular!


If you've been wanting to join the Copic craze but found them a tad pricey for your crafty budgets then you'll be very excited about these worthy rivals!  Marvy Le Plume Permanent markers are here and lucky for you Blockheads has them!  Stacey has already introduced you to them and shared some great tutorials with you already and I've been having a blast testing them out and I'd like to share my thoughts about them with you too.

The Le Plume Permanents are wonderful to colour with and blend just as nicely as Copics!   I'll be sharing some Blending Tutorials with you as well as some How To's on creating special effects with lots of tips and tricks to get you well on your way to gorgeous colouring...so stay tuned!

Just like Copics, Marvy Le Plumes are permanent alcohol based ink markers that are perfect for stampers!  The main difference between the brands is that the Le Plumes are non-refillable, single nib markers and you can't replace the nibs but at half the price of a Copic marker I think I can live with that ;0)  I even compared them to the Prismacolor permanent artists markers, which I dislike coz I'm not a fan of the tiny hard nibs so I concluded I prefer the Le Plume Permanents over Prismacolor hands down!

141 colours are available in the permanent range.  There's also White, Gold and Silver markers but those 3 are opaque, pigmented and water-based. 

The recommended ink pad for use with Copics is Memento and the same applies for the Le Plume Permanents.  They don't cause any bleeding or smudging on stamped images so you can colour right over the lines with no worries.

The Le Plume Permanent nibs are brush-like but are more bullet shaped with less of a tapered end when compared to Copics.  I'm a big Copic user so I immediately spotted the difference, however, it just took me 15 minutes of playing around with them to get a feel for how much pressure or paper contact with the tip of the nib was needed before too much ink was applied and over bleed of the stamped lines occurred.  But I had the same learning curve with my Copics though when I first started to use them too.  It just takes a bit of practice and then you're well on your way!  But don't let that scare you....remember when you first inked up a rubber stamp and couldn't get a good impression?  Well, it's the same deal, just a bit of practice is all you need!

When I first tested the Le Plume Permanents I did find that some of the markers seemed more wet than others but that seemed to resolve the more I used them, just one or two test samples was all it took for me really.  I recommend printing out the Blank Chart created by Blockheads Paper Arts and colouring in the relevant blocks when you first get your markers.  That way you'll absorb some of the excess ink and will be ready to go onto your practice samples.  You might never find that a problem though and it probably just depends on whether a particular pen was over-filled at the factory or not.

One of the 141 markers is a colourless Blender Pen.   The Le Plume Permanent Blender works exactly the same as the Copic Blender and can be used for blending, creating special effects as well as an awesome mistake corrector!  It worked really well at removing some of the over-bleed when the ink spread a bit beyond the stamped lines.  It's very important to know that the Blender Pen acts more like a bleach and removes colour!  The blending of colours is preferably done with the lighter marker in the colour range you're using, which is also true for Copics too.


I also had the opportunity to play with the White and Gold markers and both are awesome.   They have fine plastic tips and the Le Plume White is a nice companion pen to the white gel pen I use coz you can get bigger dots quickly with the Le Plume and I really like the instant opaque ink.

Stacey and I worked very hard at creating some fantastic Blending Sets consisting of 3-4 markers for you to start your collections as well as a Starter Set of 46 markers of the most versatile colours just in case you want to dive right in!   There's an awesome Colour Chart for you to drool over and don't forget to print out the Blank Chart too!  

But if your not sure if these markers are right for you or your crafty budget allows you only to start with 3-4 markers then don't worry coz my first tutorial "Passion For Purple" which will be out this week will demonstrate just how much fun and use you can get out of one blending set!  I have no doubt you'll be hooked ;0)

The coloured image I'm using for my Blending Tutorial can be seen on my blog at Leigh S-B Designs, I made a very purple Halloween card called "Miss Purple Poison" ;0)


Attention die hard Copic fans! In case you didn't know, Blockheads Paper Arts is now also carrying the Copic Sketch markers!

Stacey has provided a Colour Comparison/Substitute Chart for those of you who want to start with the Marvy Le Plumes and then switch them out with Copics when you need to replace them or for Copic uses who want to follow along with our tutorials and would like to know the marker equivalents!

Keep a close eye on the Blockheads blog and newsletters for more Marvy Le Plume Permanent Markers news and tutorials!

Thanks for stopping by!
Leigh S-B
THE SHARPIE DOMINO QUEEN


Friday, October 7, 2011

"Miss Purple Poison" - A Blockheads Design Team Card by Leigh S-B

Howzit Stampers!
There's a new permanent marker in town worthy of being a rival for Copics and guess what, they're more affordable and just as awesome and they're now available at Blockheads Paper Arts just in case you missed seeing Stacey's previous posts!
I've been having a blast experimenting with them and today I'm sharing a Halloween themed card I made using the new Marvy Le Plume Permanents markers and soon I will be sharing a step-by-step Blending tutorial demonstrating how I went about colouring the image featured on my card as well as a product review here on the Blockheads Blog!  So keep an eye out for those!
SUPPLIES
Blockheads Paper Arts rubber stamps:
Flourishes (partial of the Bird Cage stamp) from Victorian Eccentricities

Marvy Le Plume Permanent markers:  BV733, 736, 738, 739 and OP920 White
Prismacolor pencils:  Cream, Blush Pink, Parma Violet, Red Violet and Black
Three shades of purple cardstock
Recollections Paper Border Toxic Labels
Decorative silk ribbon
Spellbinders Dies:  Fleur De Lis and Deckle Rectangle dies
Tim Holtz Alterations Raven and Scardy Cat die
Fleur De Lis Corner Punch (brand unknown)
Scissors
 
 Pop on over to my blog, Leigh S-B Designs, for the full tutorial!
Have an awesome weekend!
Happy Stamping!
Leigh S-B
THE SHARPIE DOMINO QUEEN

Tuesday, October 4, 2011

4 New Digi-Stamps Not Just for Zentangle

Digital-Images - Happy Halloween Digi-Stamp by Blockheads not just for Zentangle ArtistsDigital-Images - Mansion Digi-Stamp by Blockheads not just for Zentangle Artists
We just added 4 new digi-stamps, each with a decorated and undecorated version, so you can choose to Zentangle or not to Zentangle your own images.  These include:
Pumpkin on the Vine
Mansion
Boo
Happy Halloween

Saturday, October 1, 2011

31 Days of Halloween on the Domino Art Blog


Hop on over for some spooky stamping on domino ideas!

'Madeline Usher' Cameo Necklace by Leigh S-B

Happy World Card Making Day Everyone!

 A few days ago I shared my 'Bride of Usher' art card and promised you a matching Necklace and here it is, I hope you like it ;0)  I should have shared the card today instead with it being World Card Making Day and all, silly me!


 If you're a fan of Tim Holtz Idea-ology goodies then you're going to love this project coz I used one of his tarnished gold Ornate Plates as the frame for my spooky miniature 'portrait painting' of
Madeline Usher!

I used the same Goth Girl stamp from  Blockheads Paper Arts exclusive Di's Characters rubber stamp collection as the focal point of my dark and twisty Cameo Necklace as well as the Script 'Backgrounds for All Occassions' stamp for the backing of this piece.  I had a spooktacular time designing this and the matching art card!

Pop on over to my blog, Leigh S-B Designs, to see the full tutotrial as well as two more 'looks' I created for this spooky antique piece!

Supplies 
Goth Girl and Script stamps available from Blockheads Paper Arts

Ink pads: 
Brilliance Lightning Black, Memento Tuxedo Black 
E000, E41, W1, W5 and Black 110 
Cream, Chartreuse,  Crimson Lake, Black Cherry and Black
Xyron Permanent Adhesive
Jewelry Findings and tools
Assorted glass beads
Dark Plum suede cord


Stacey hinted in her recent newsletter that a domino necklace might have been in the works for this project and I hate to disappoint so check out the Goth Girl DominoART Necklace I did make a while ago in case you missed seeing it ;0)

Happy Stamping!
Leigh S-B
THE SHARPIE DOMINO QUEEN